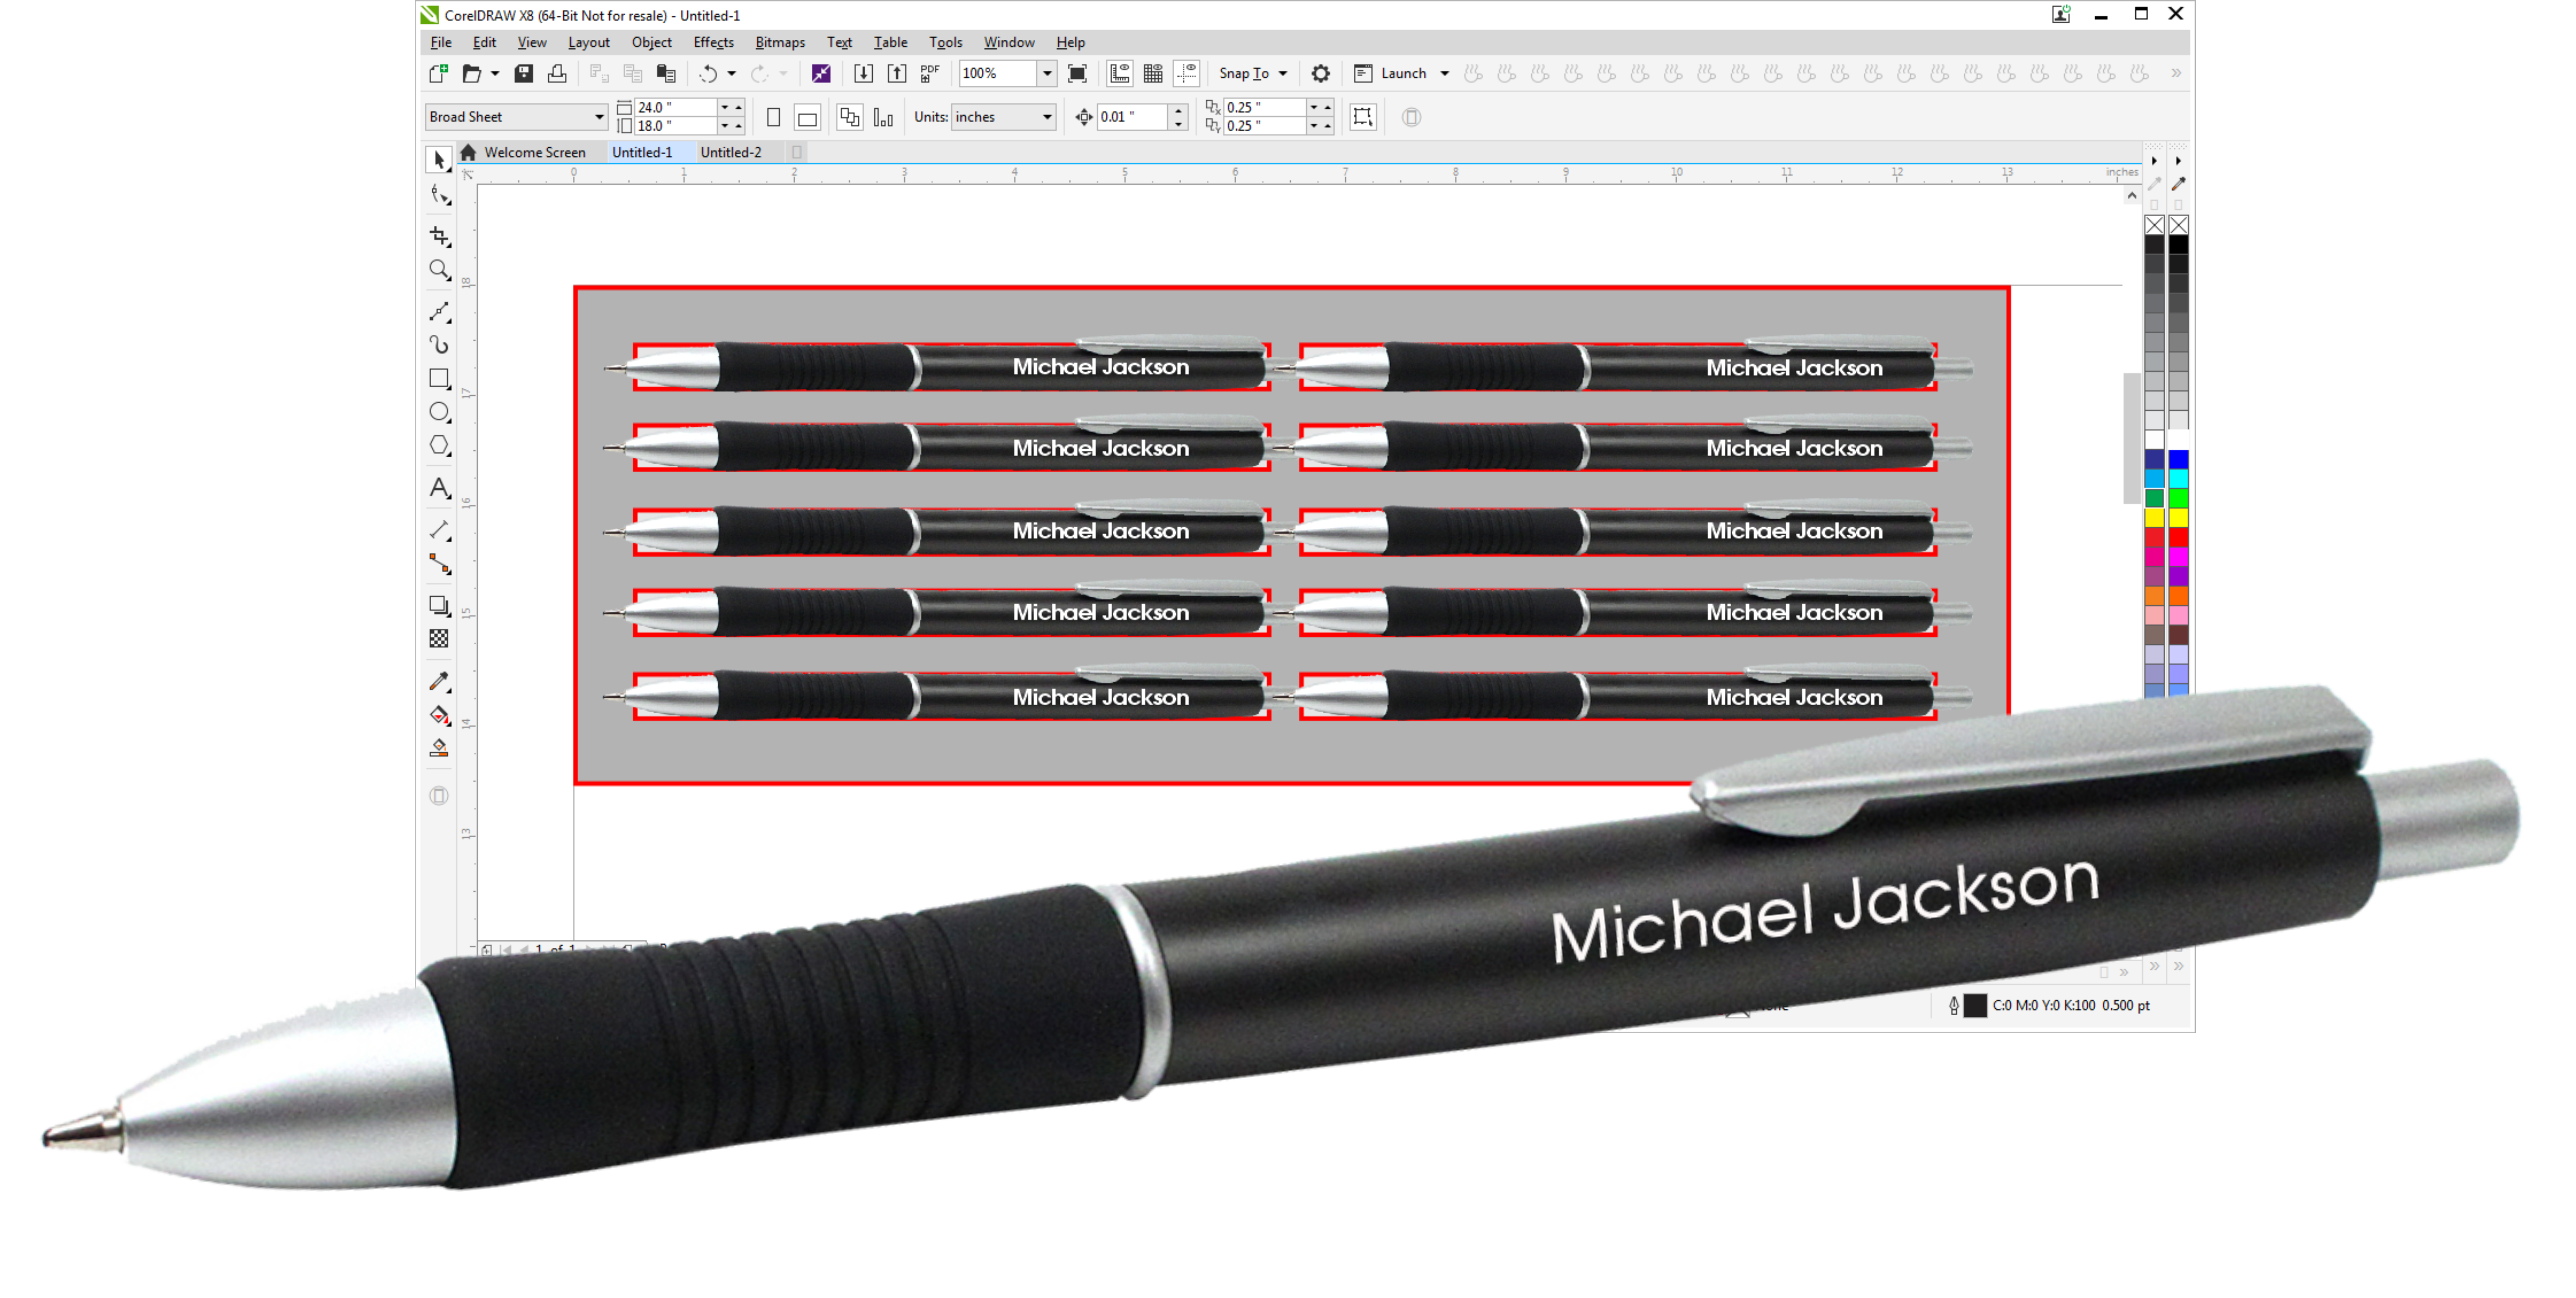
Using Templates in CorelDRAW
The efficiency of your laser can be best described in Parts per Hour. Tracking your parts per hour is an excellent method to measure the productivity and profitability of your laser system. Quick and accurate setups for each new order will make a dramatic effect on the productivity of your laser and are the key to increasing your parts per hour.We find many laser system owners rely on the rulers at the edge of the engraving table to position a single piece to engrave. This system works well for one-piece orders but severely limits the number of parts per hour that can be engraved for larger, multi-piece orders. The typical questions from laser system owners include, “How do we accurately position dozens of parts to be engraved on the engraving table?” and “Is there a way to layout the graphics and text to engrave on each part?”
The simple answer to both questions is “yes!” An engraving fixture will allow us to exactly place the part on the engraving table and a software template will allow exact placement of the graphic and text. (A fixture goes into the laser to hold the product; a template opens in DRAW to hold your text & graphics.) Take the time to learn how to create a software template to layout the engraving graphics. The software template will be used in conjunction with the fixture on the engraving table to accurately position the parts to be engraved. Templates and fixtures are the best way to increase the parts per hour of your laser system.
Using Templates
The software template will represent the outside dimension of each part and include the graphic and text to be laser engraved. Any layout software that can interface with your laser system can be used. Some common layout programs used include CorelDRAW, Adobe Illustrator, and Engrave Lab Laser. Since many laser owners use CorelDRAW, we will illustrate how to create templates using this software application.
Steps to Creating a Template
Step 1:
Launch CorelDRAW
Step 2:
Select the New File icon from the opening menu to start a new, blank drawing area. Save your file to an appropriate location with an appropriate file name.
Step 3:
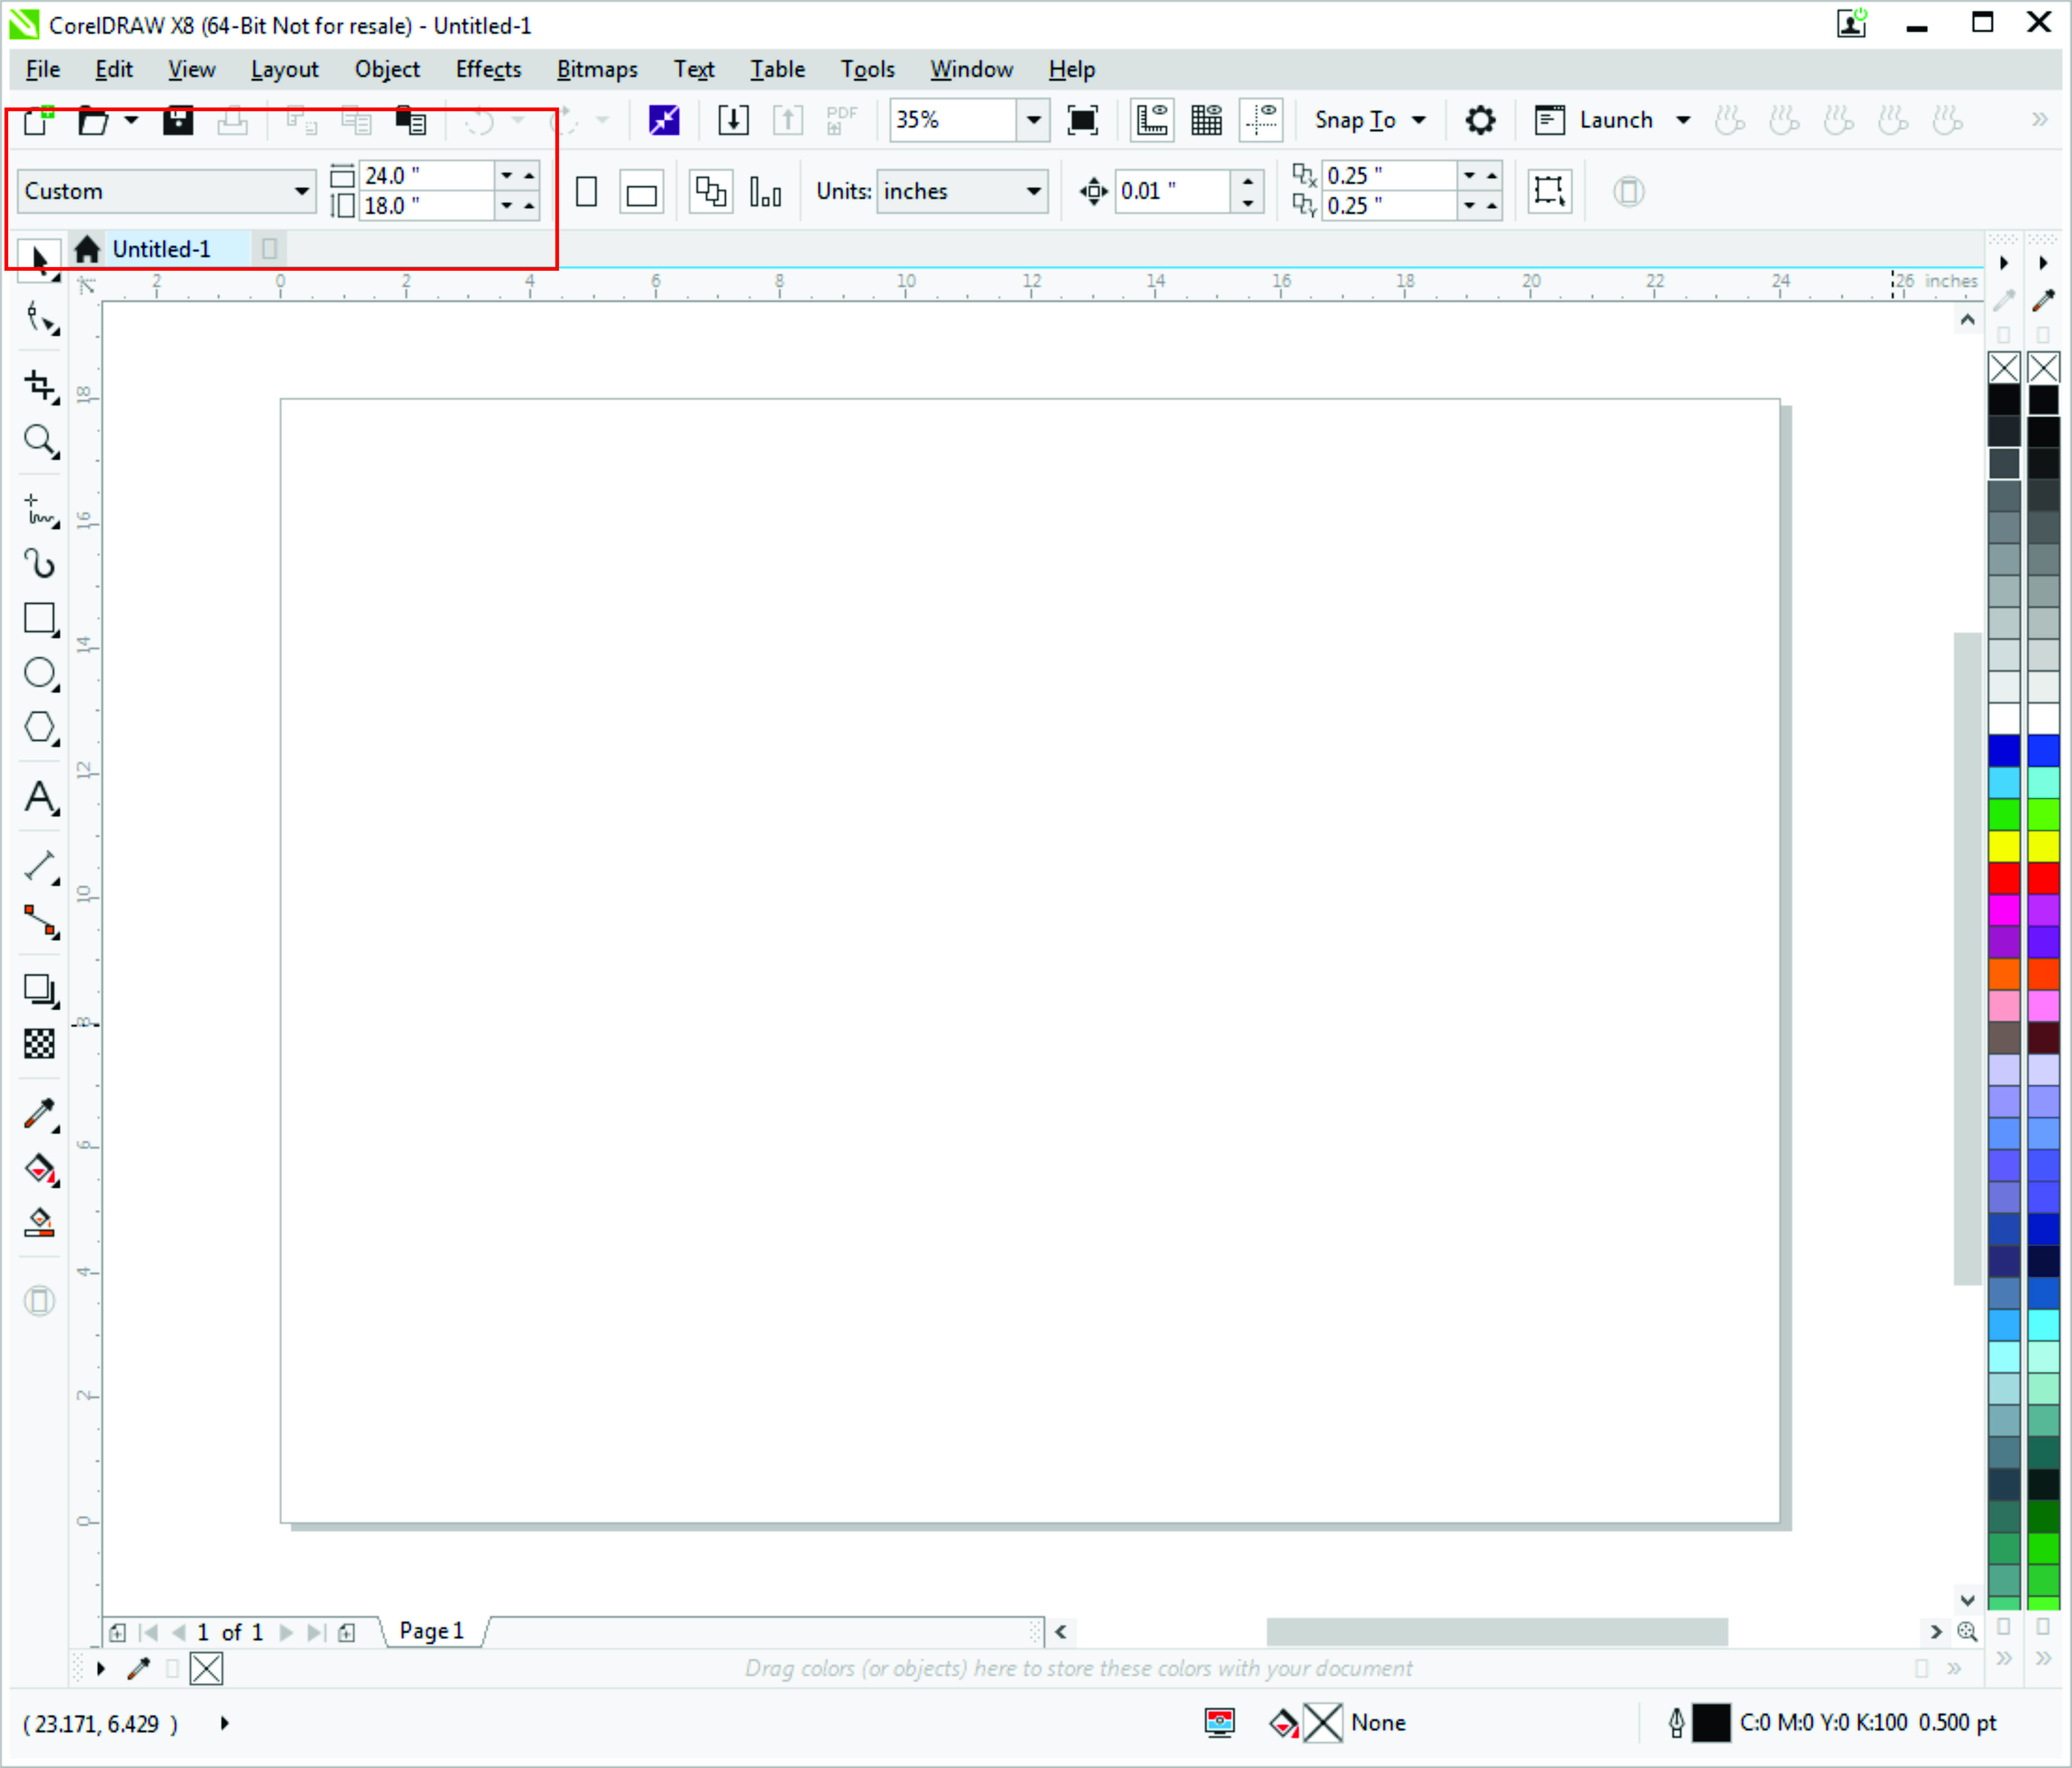
Set the drawing area size to the dimensions of your laser bed. In this example the bed size is 24" x 18." Both settings are shown below inside the red outline.
Step 4:
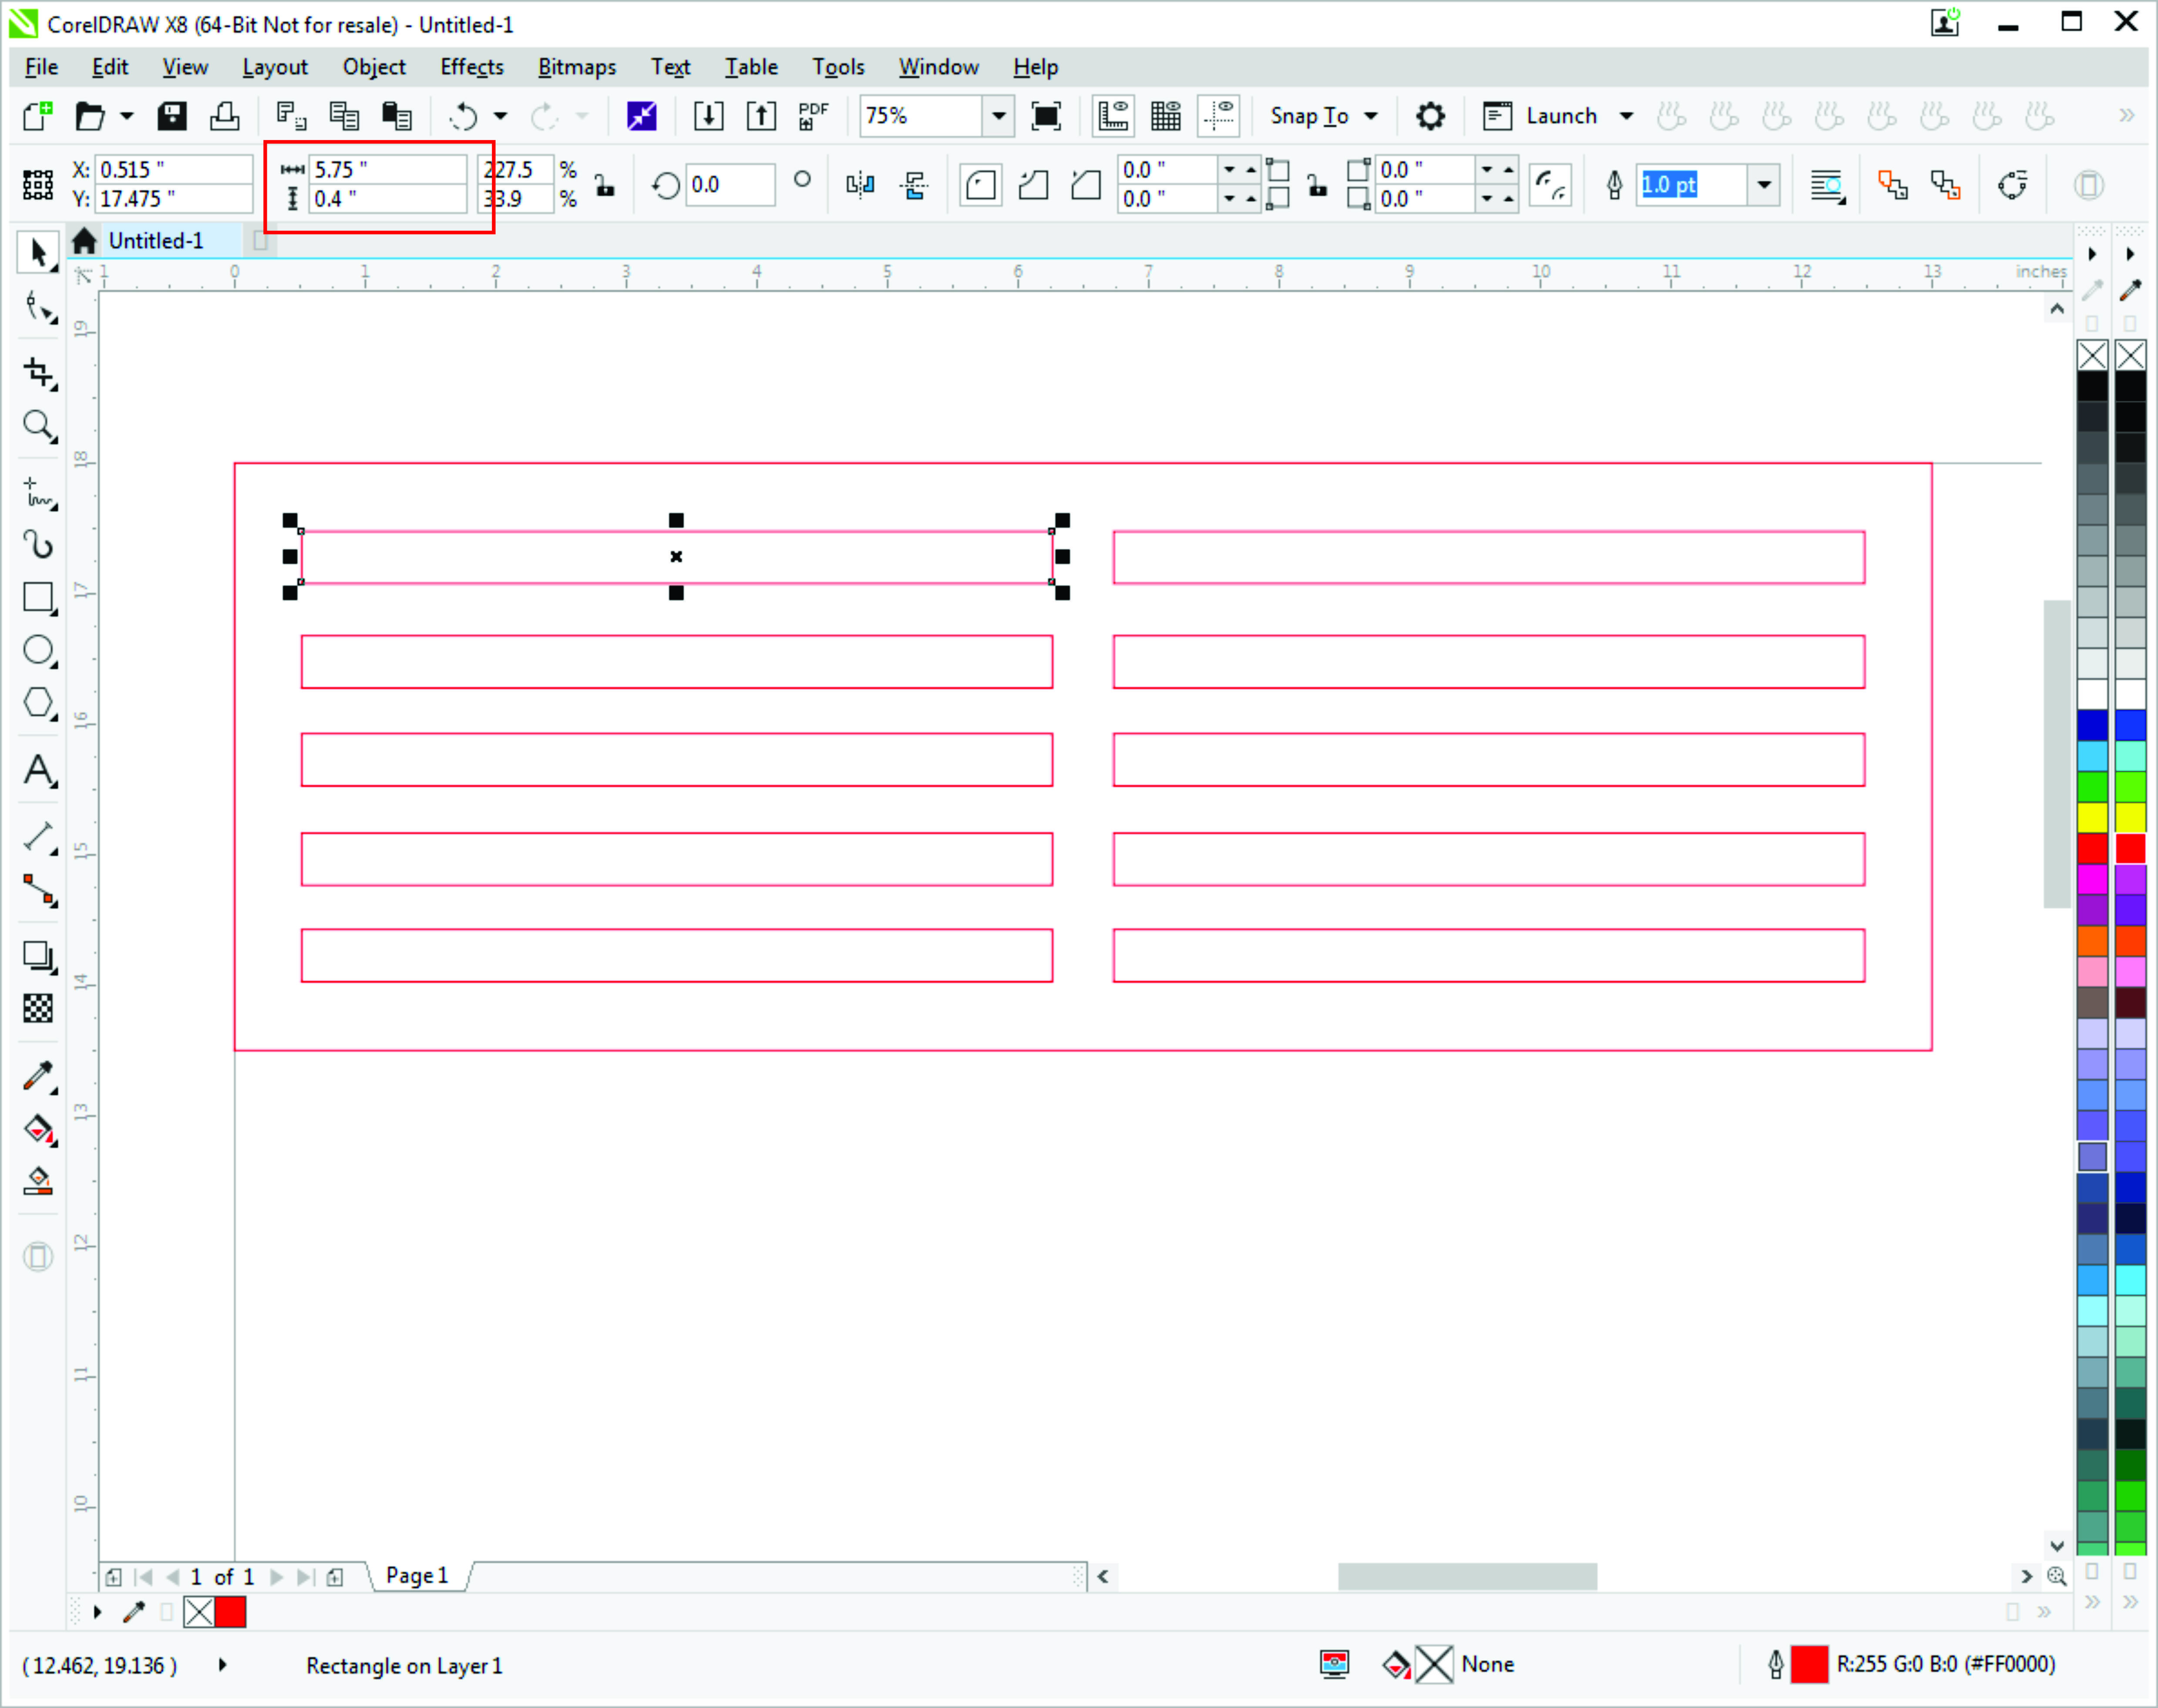
Now go to your blank page in CorelDRAW and use the rectangle tool to create your outline of your jig. After you have created your size of your jig, you will want to start laying out your template. Ideally, to make sure your template will be durable, start your product templates within .5" from the edge of your jig.
The part being engraved today is a set of wooden pens. The order calls for 12 of these to be made. Lay the part flat with the engraving surface facing up and measure the dimensions. Since a pen may vary in width along its length - use the dimensions to match the widest point, NOT including the clip. Just measure the pen body itself. This pen measures 5 3/4 inches long and .4 " wide (at the widest point).
Step 5:
We will now introduce a new feature - the Object Manager. It is critical to be able to lock objects into place so they do not move. If any of our finished product moves even a fraction of an inch it would throw off all of the engraving and add a product for the scrap bin.
Step 6:
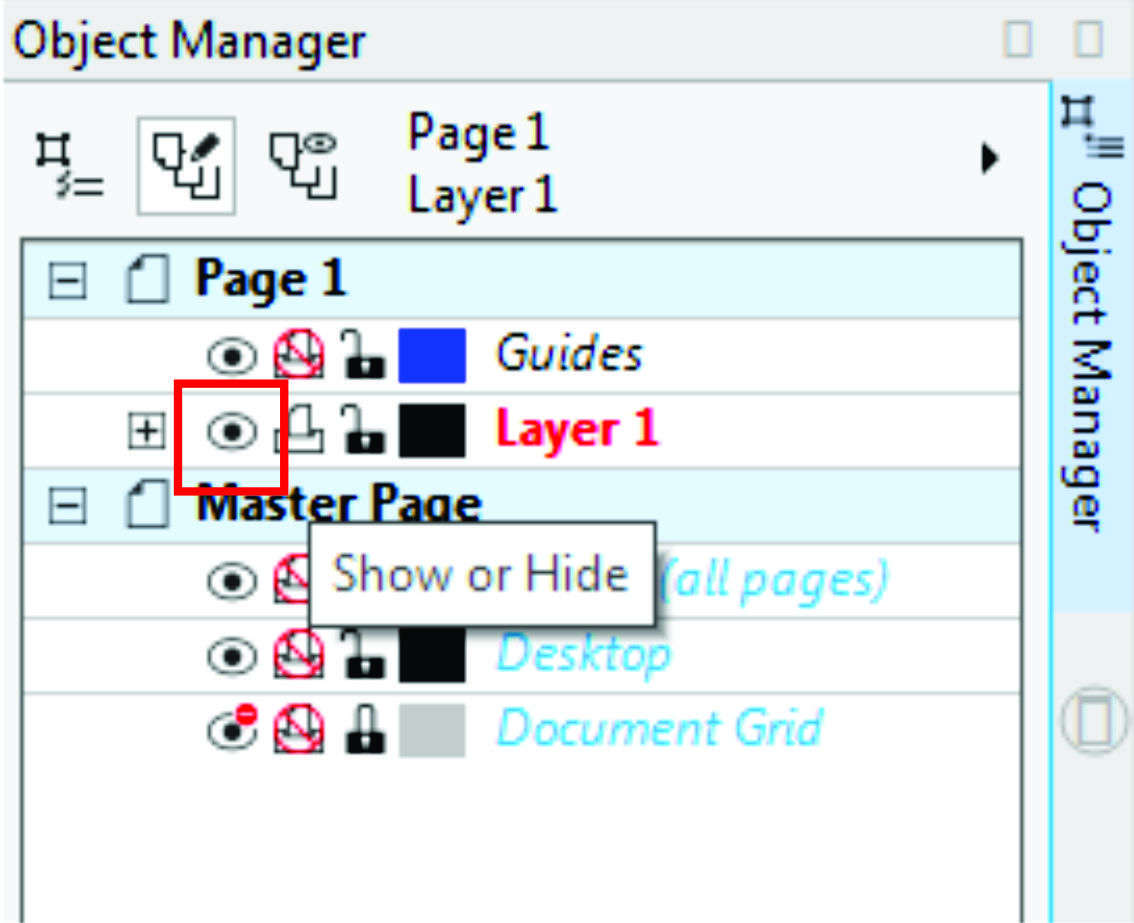
Open the Object Manager by going to Window>Dockers>Object Manager. It will open as a new docker along the right panel. The Object Manager allows us to layer graphics like a cake. We can then "Hide" layers/elements, "Enable/Disable" printing, and even "Lock" certain layers to leave others editable allowing for modifying. If you are familiar with Photoshop, the concept is similar.
Step 7 - Hide Objects
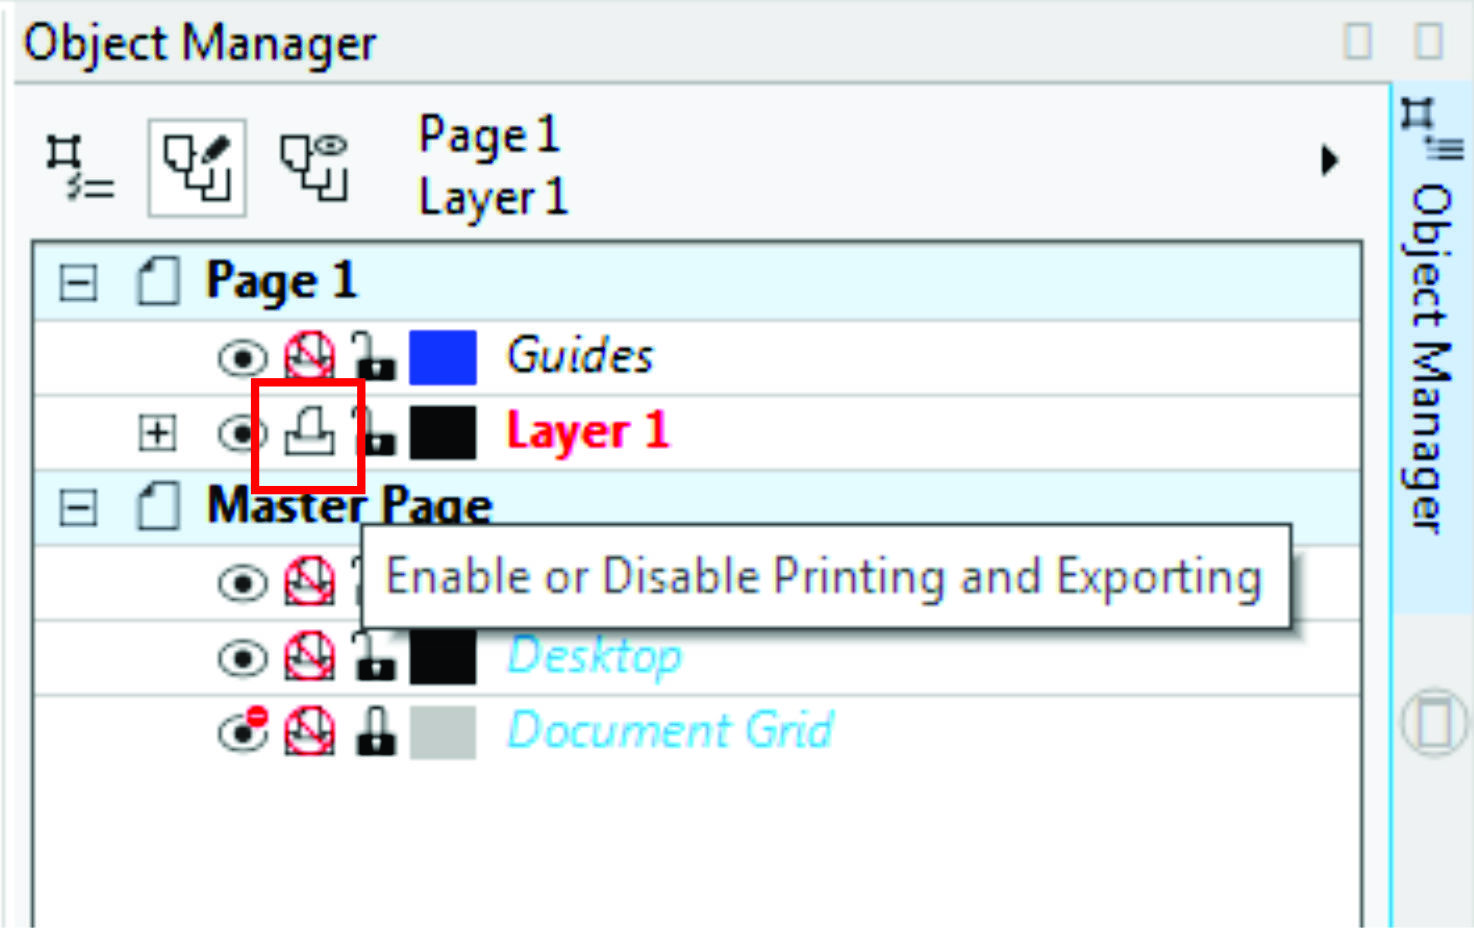
Step 7 - Enable/Disable Printing
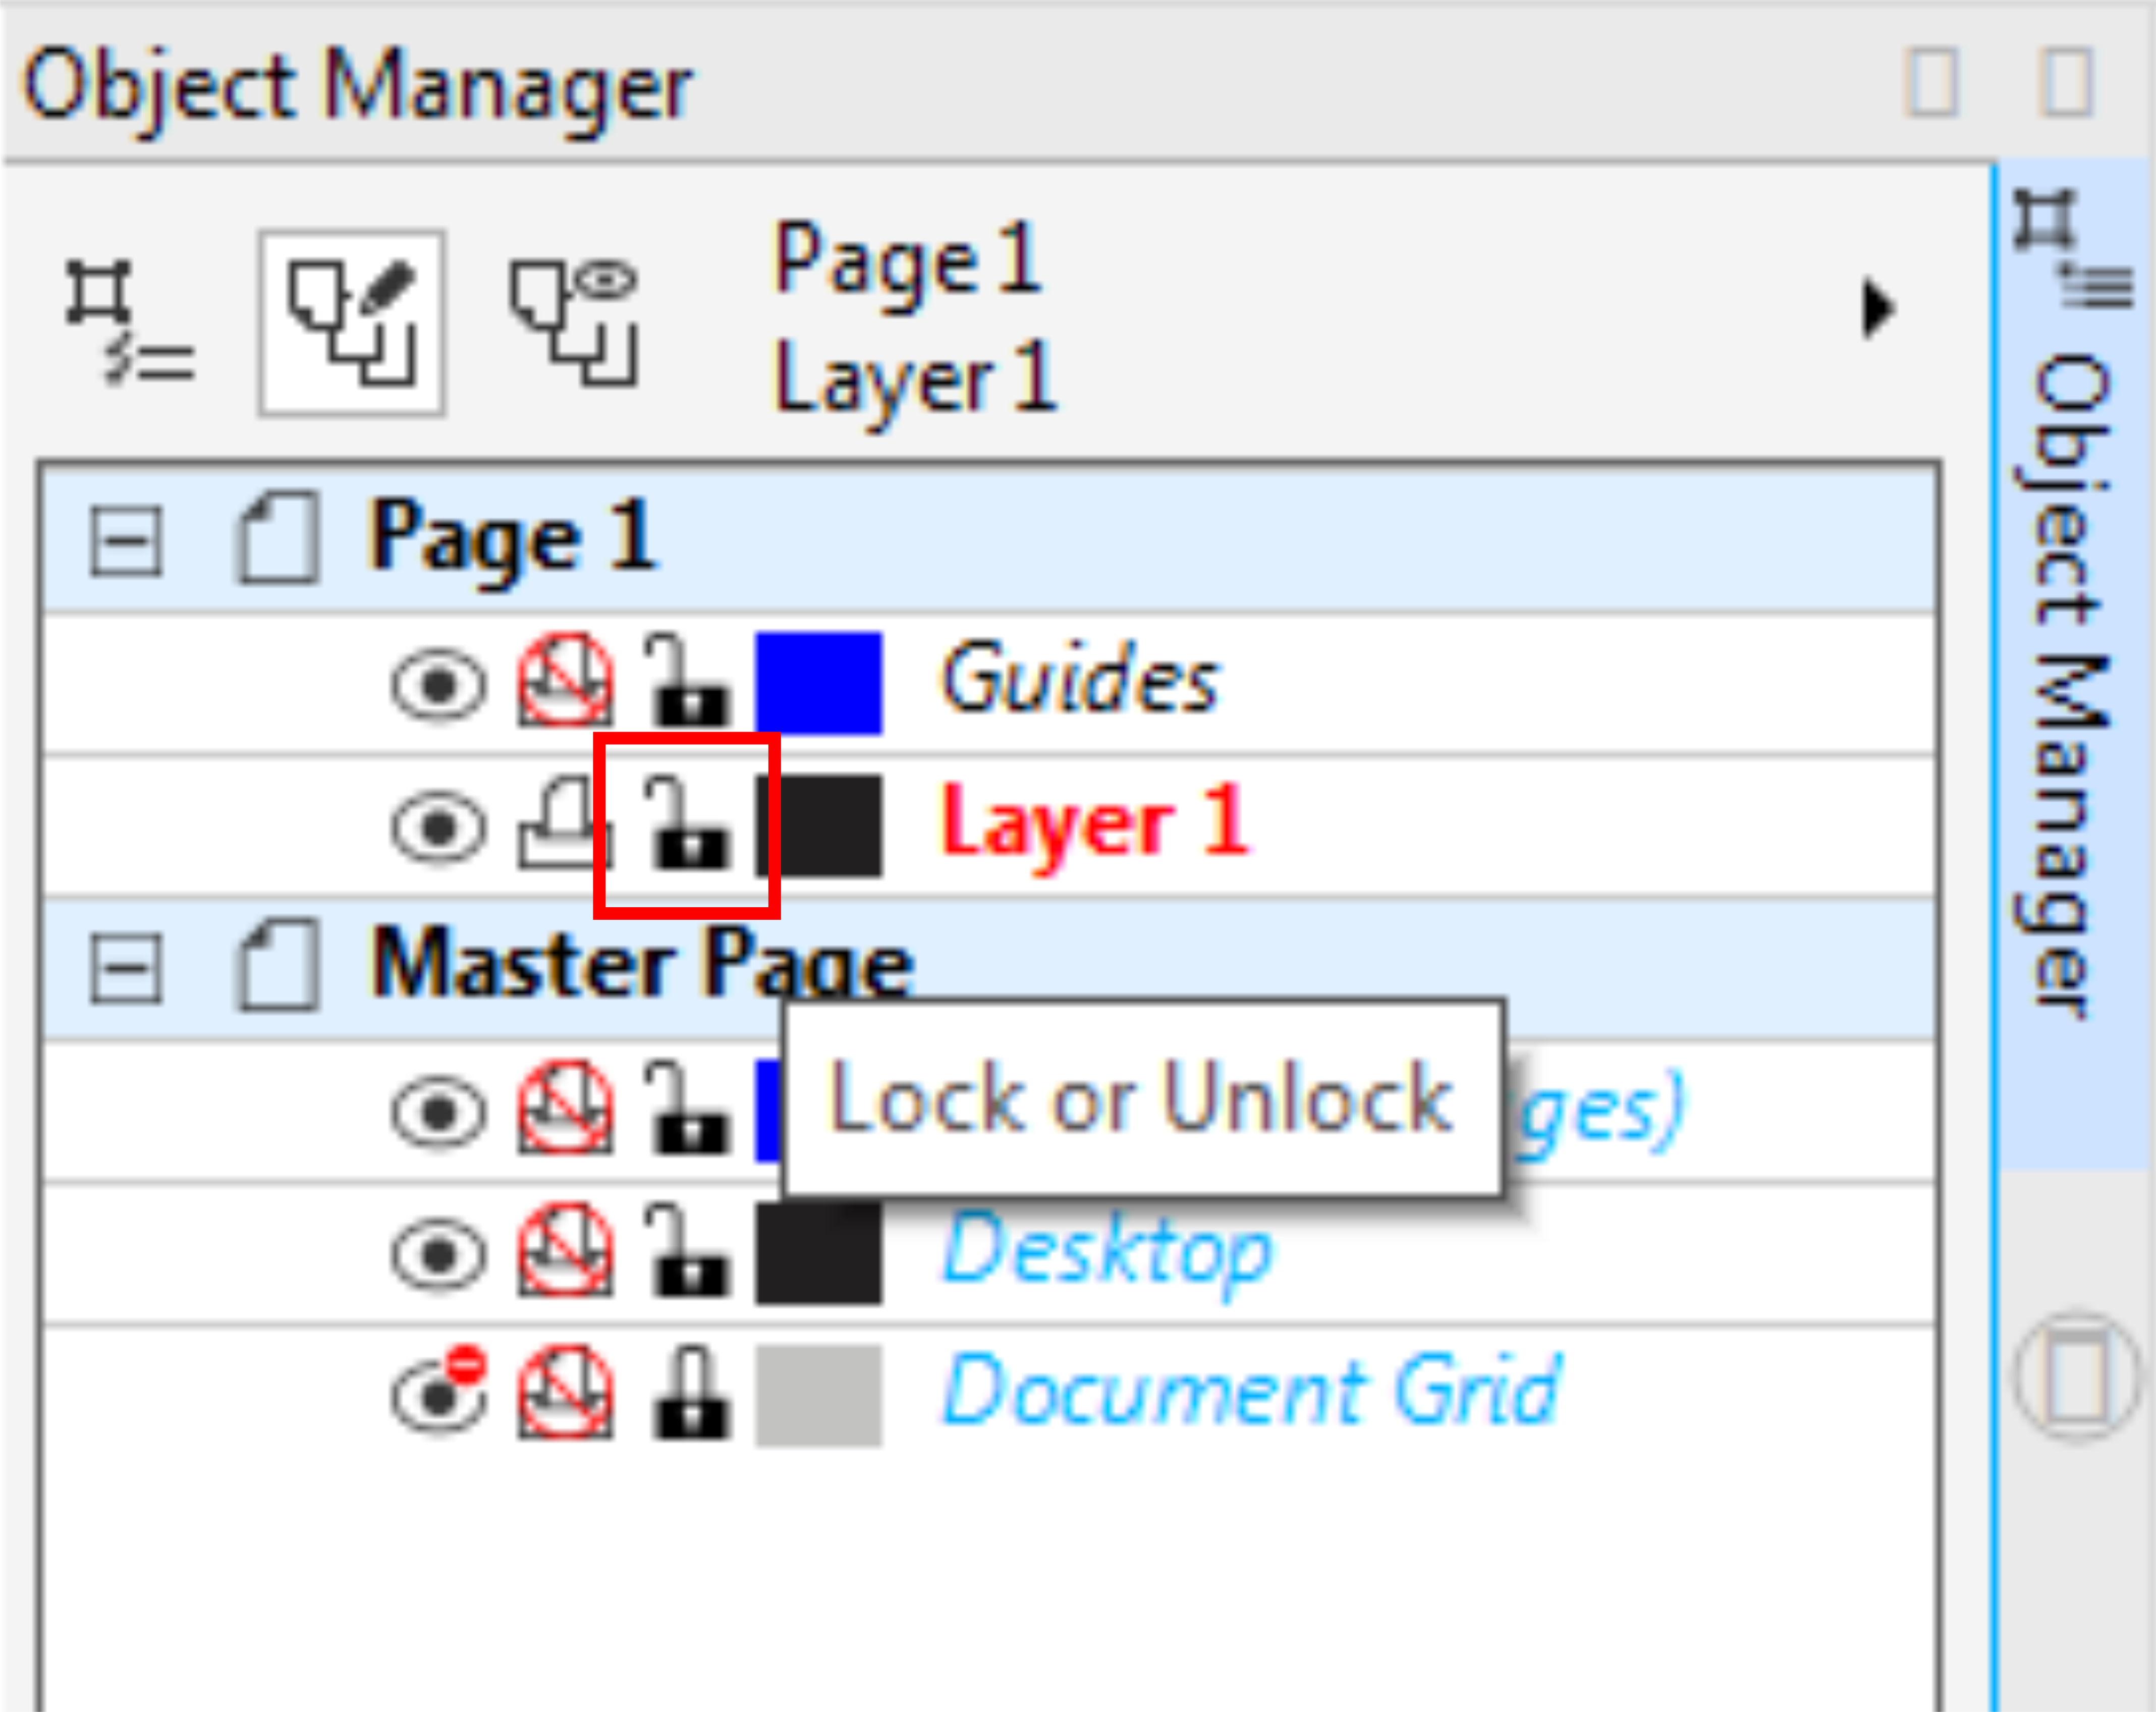
Step 7 - Lock/Unlock Objects
Step 7:
Click on the Padlock icon now to "lock it." You will find you can no longer select the red rectangle you drew in the drawing area. It has been made un-editable. This layer is now locked. We are going to need this layer to be editable, so click on the Padlock again to unlock it.
Step 8:
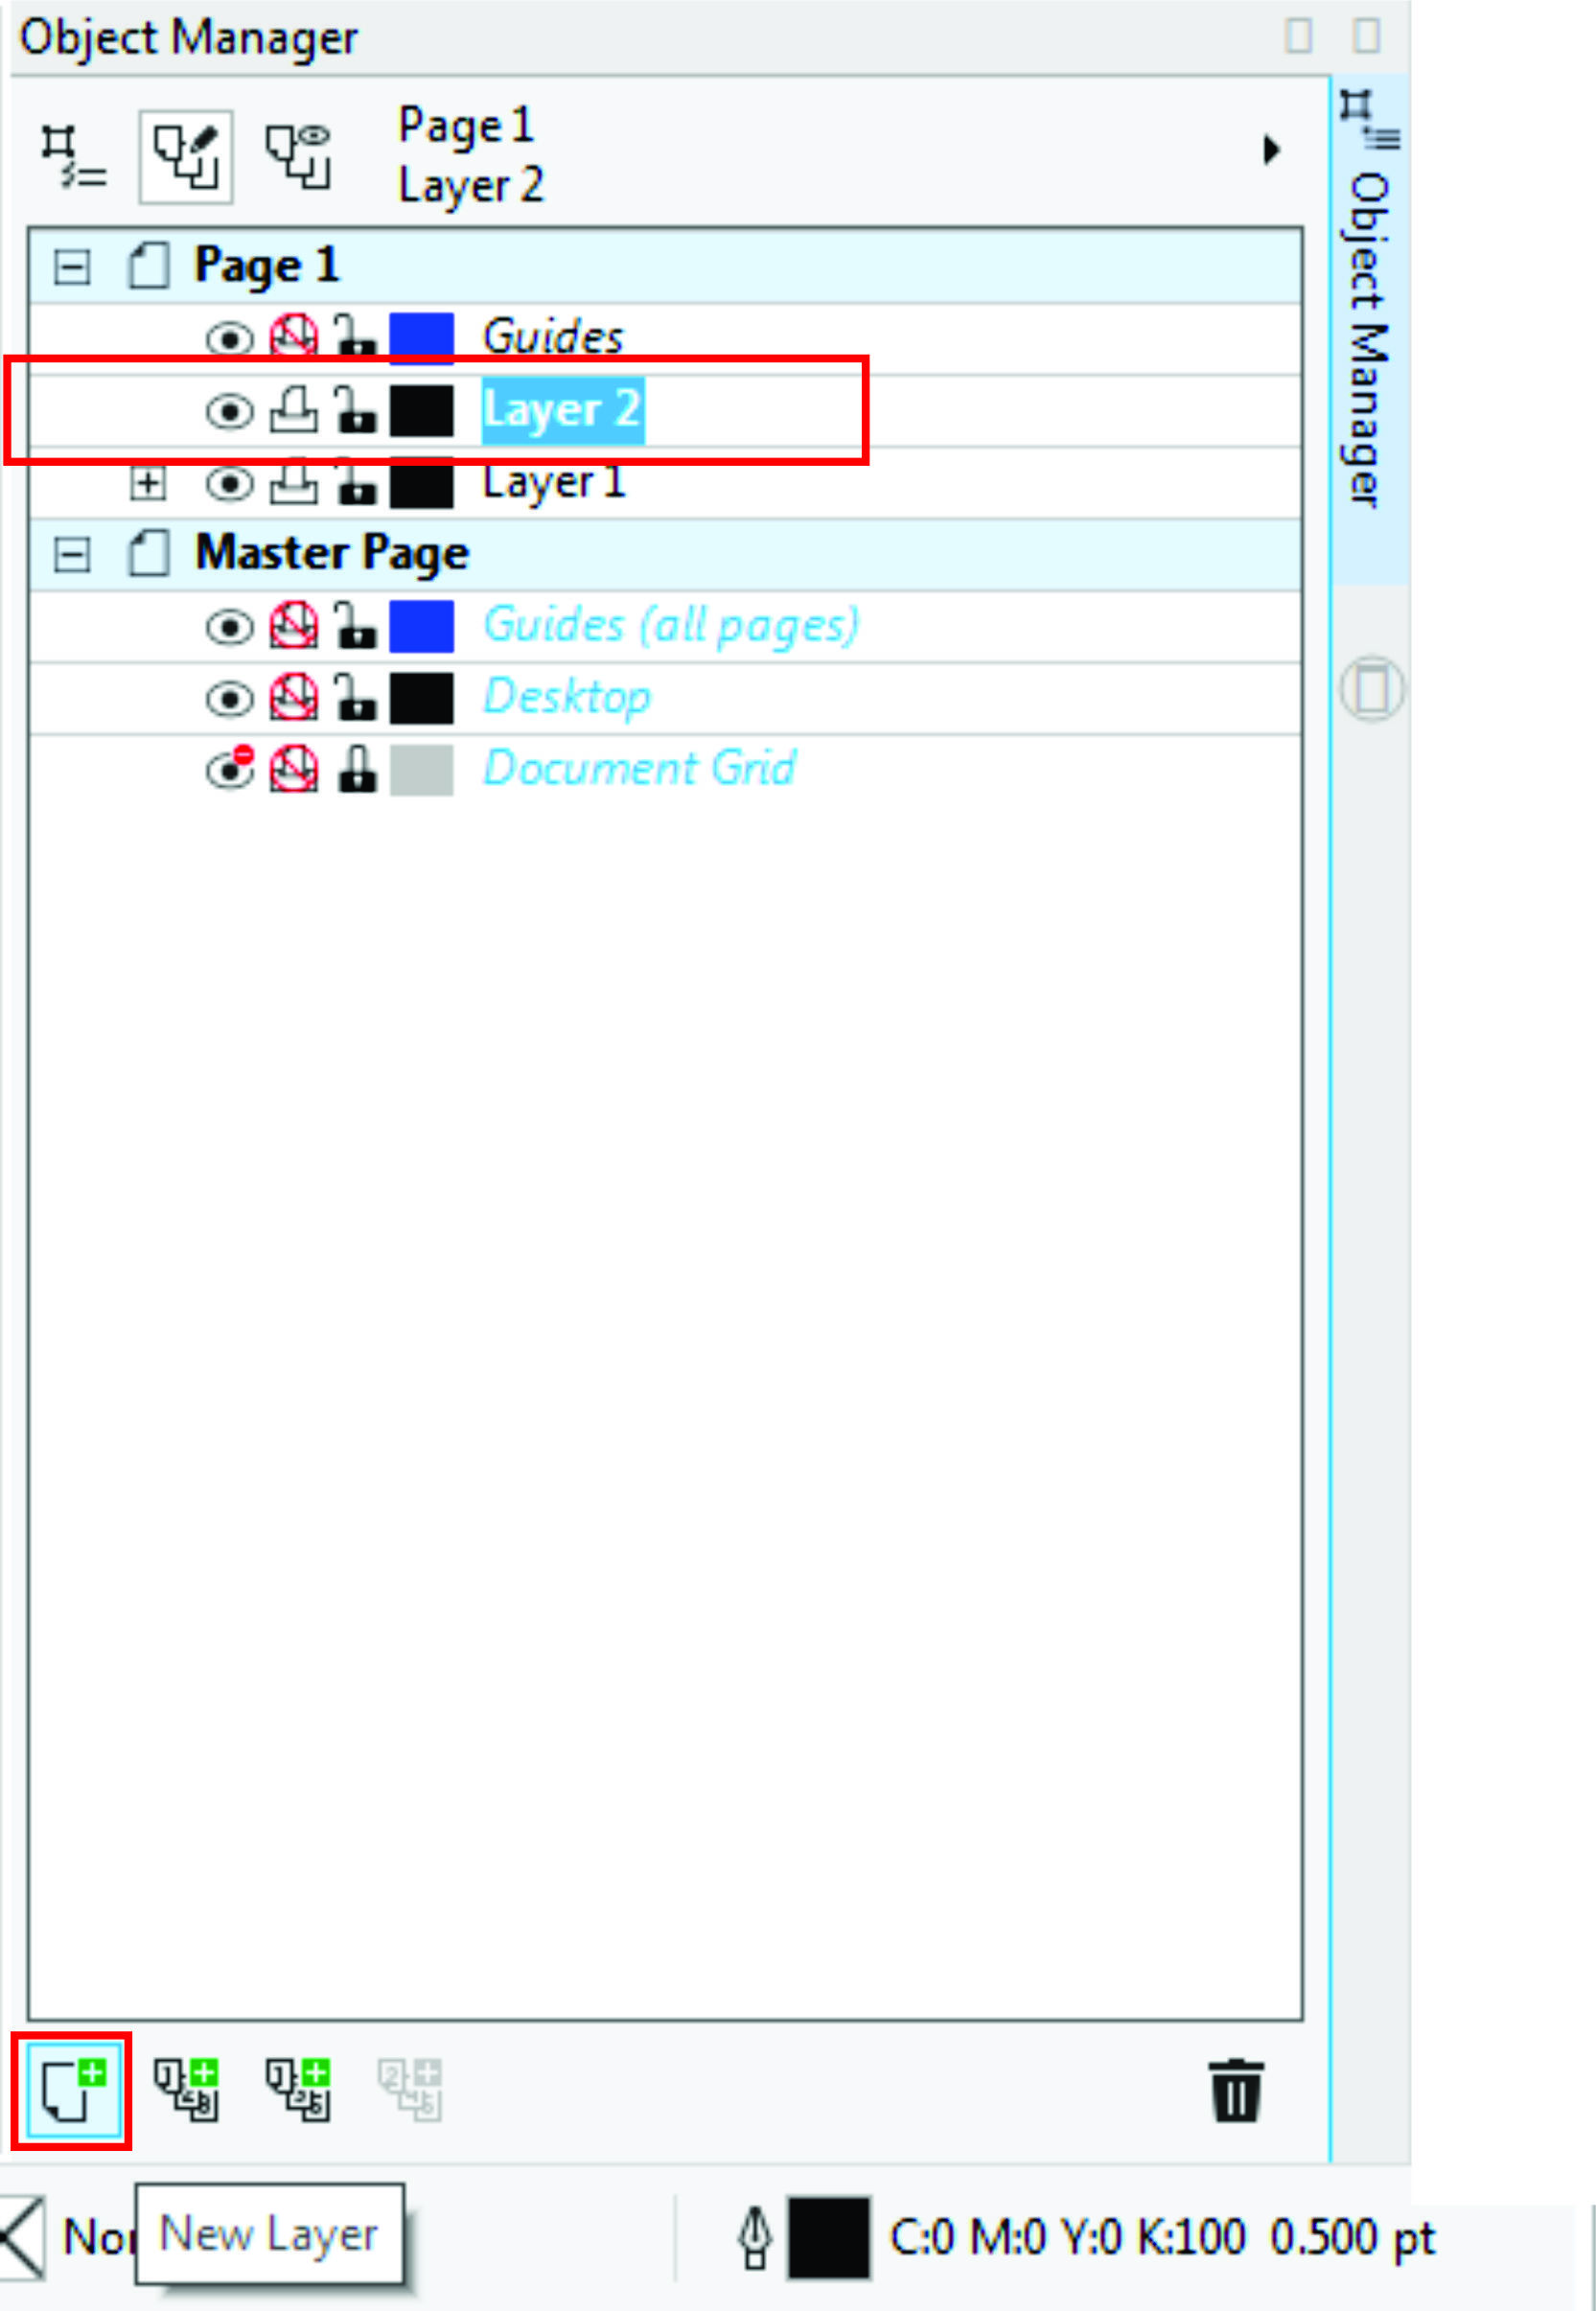
We will now add a new layers to our current object for our text. A new layer can be added by selecting the New Layer icon at the bottom of the Object Manager.
Step 9:
This new layer is going to hold our Engraving Text file. Select the Layer 2 in your Object Manager then select the Text Tool on the left tool bar. Place your cursor where you want your intended text to engrave.
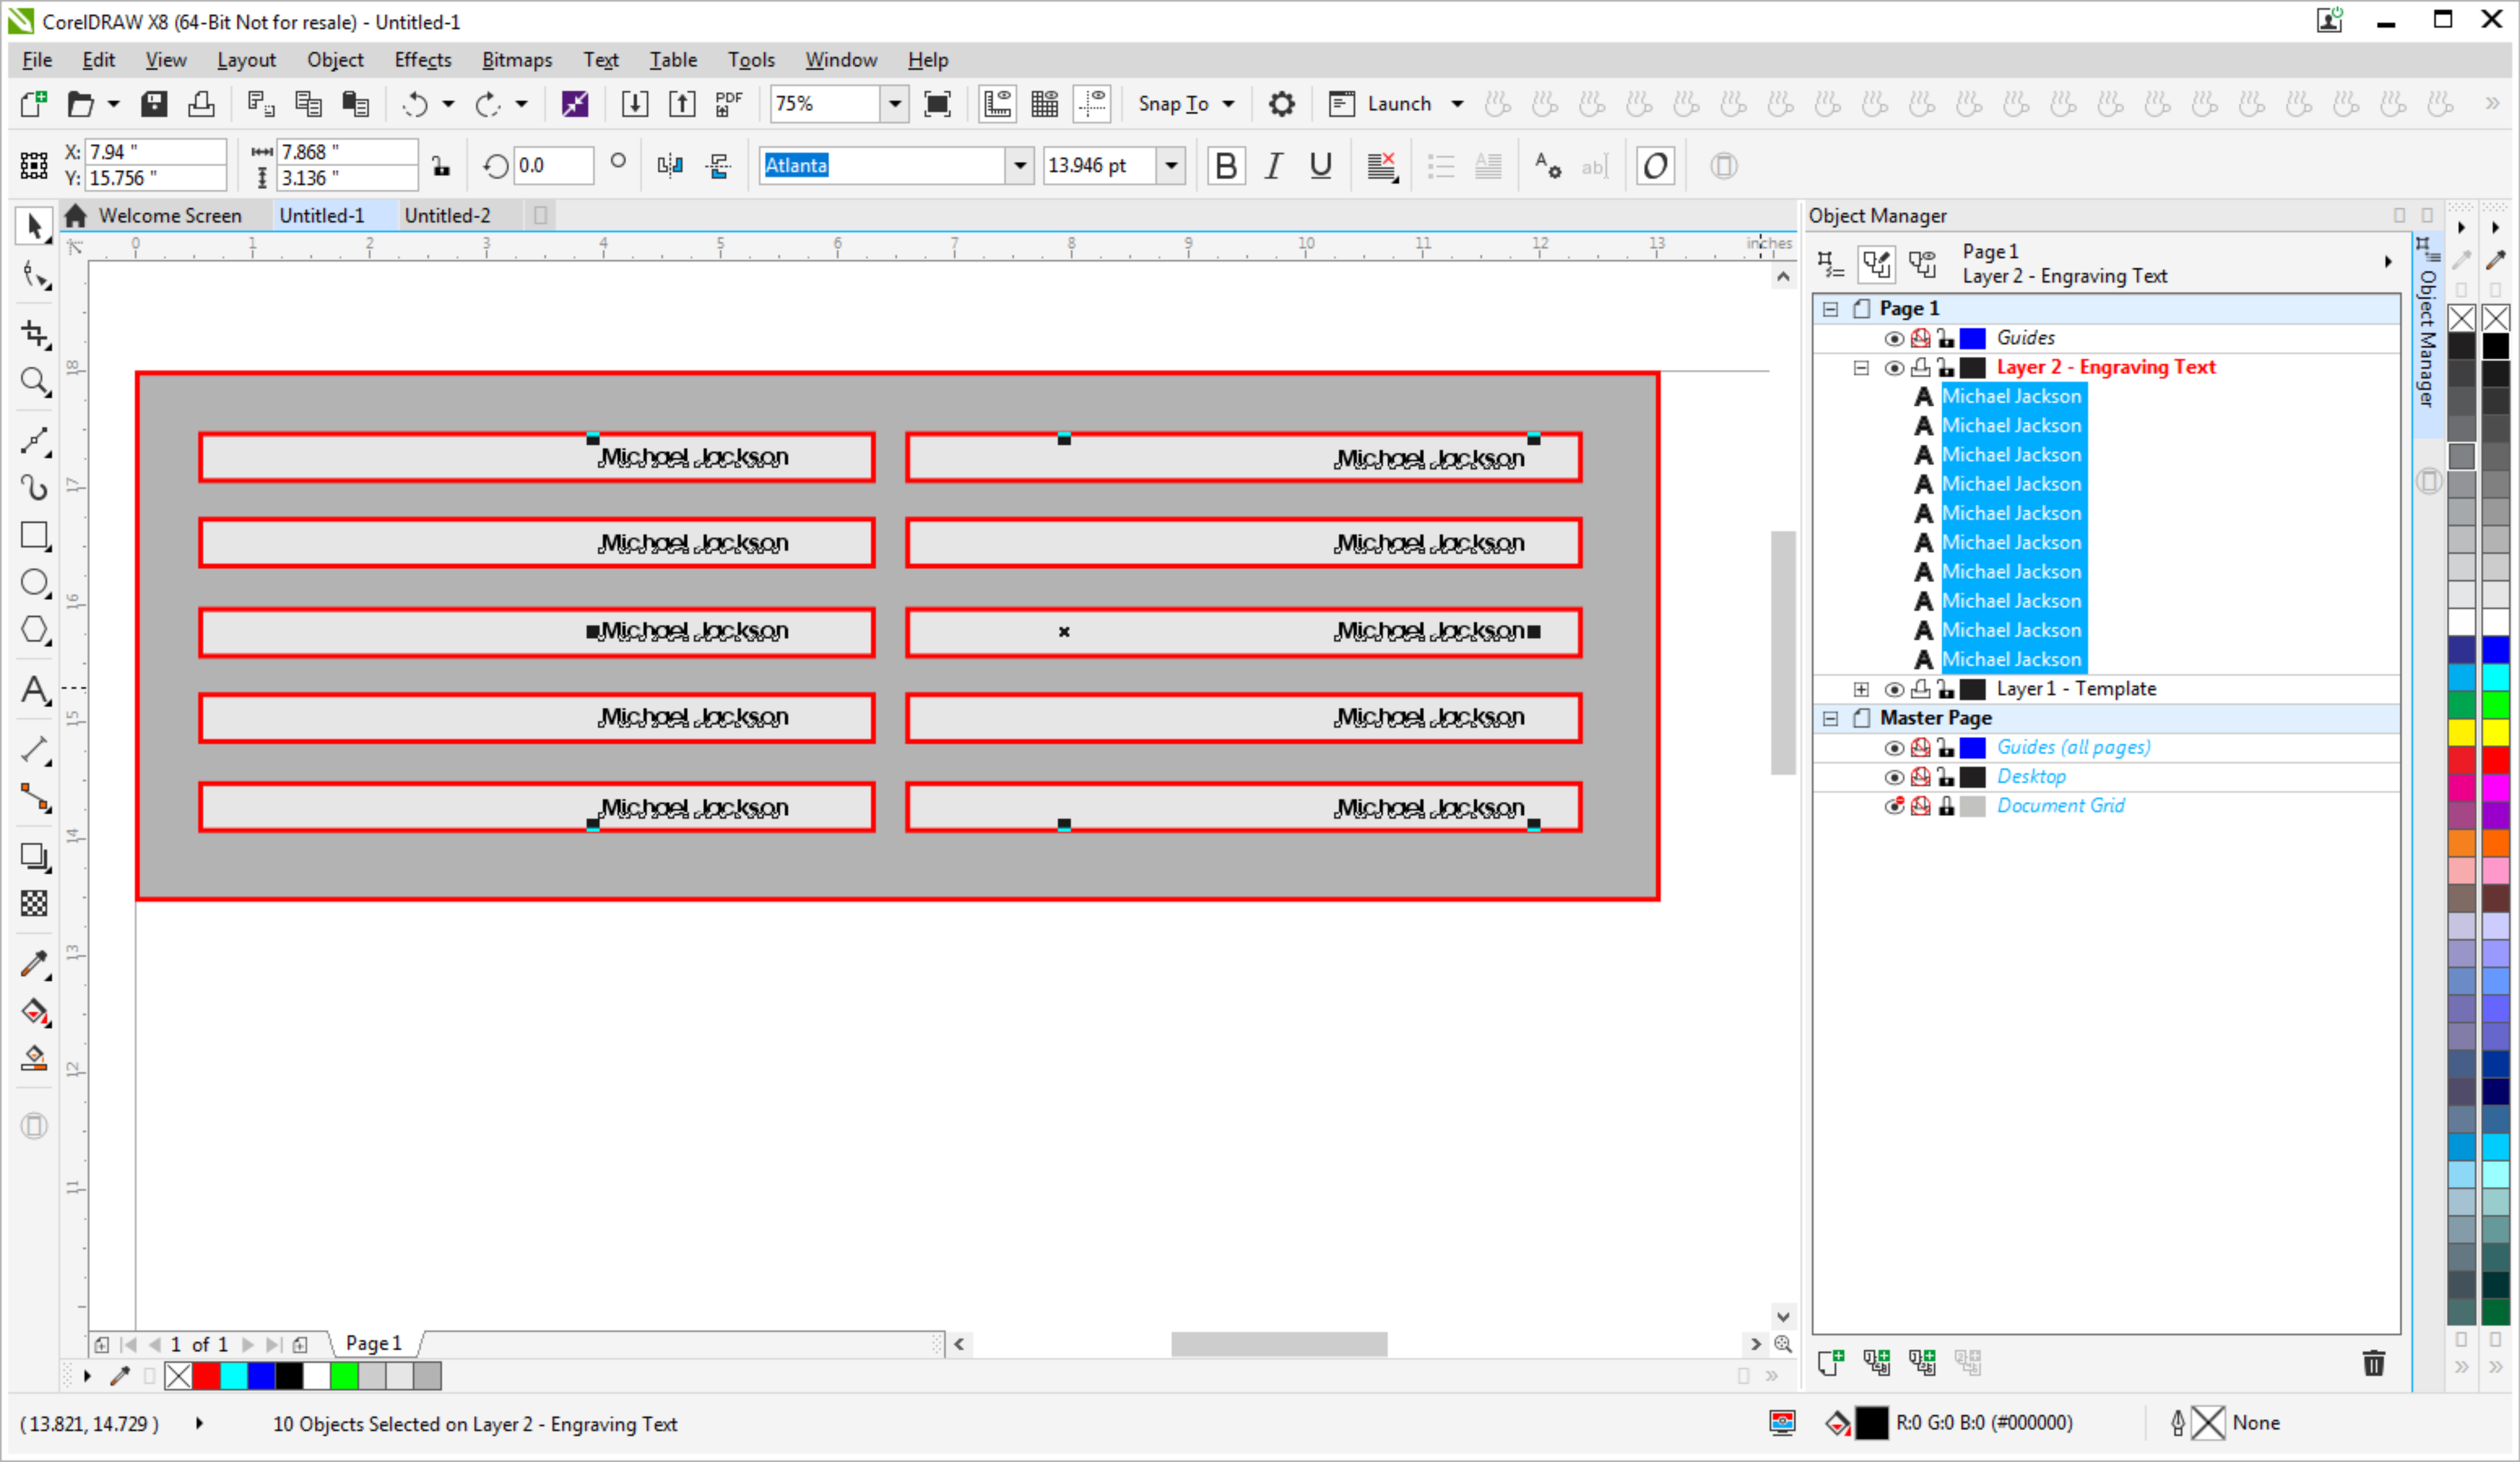
Once you have set up your engraving file, send your engraving data to your laser and engrave away!
